
Managing permissions and data access is important for any size team. In Amberlo, you can grant access to or give permissions to all users in your law firm, because it's a critical aspect of keeping your data safe and make accessible to those who need it.
Note: User Permissions operate slightly differently, depending on your subscription type.
Quick Overview
What is an Administrator (Admin)?
Any Amberlo user can be granted Administrator privileges. Administrators have all access to all users’ data. Administrator privileges are related to managing the account, and include the following areas which are accessible through the account settings:
• Account information – account name, currency type, account cancellation.
• Subscription - upgrading and downgrading account subscription plan.
• Matter, Contacts, and Contracts – adding, editing or deleting custom fields.
Only current Administrators can promote other Amberlo users to Administrator status.
How to Find User Permissions?
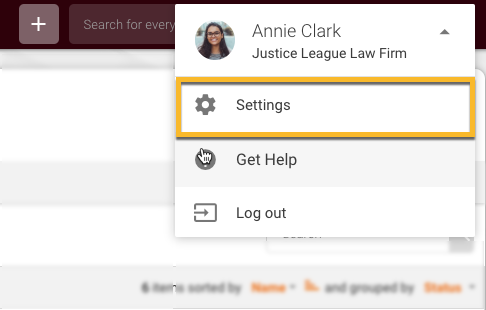
1. Go to Amberlo Settings:
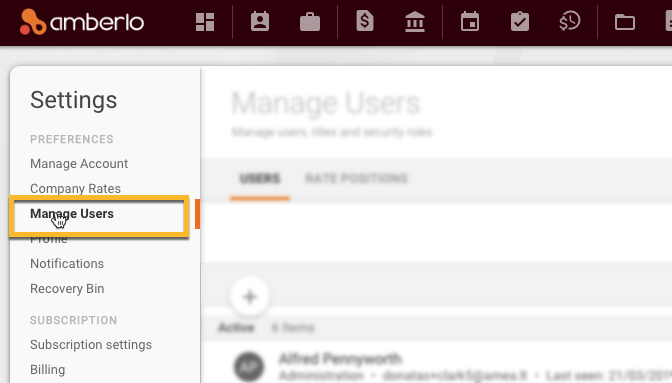
2. In the left-hand Settings menu click Manage Users:
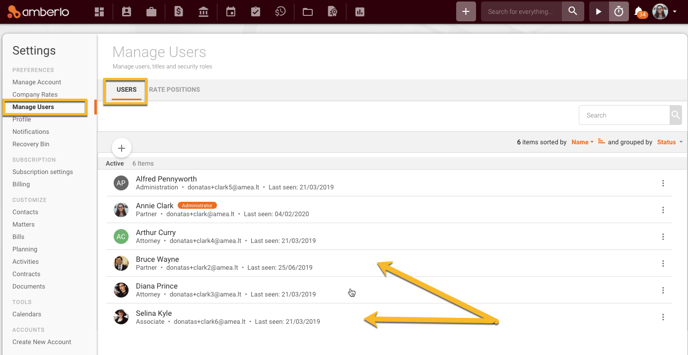
3. Now you will see the users list in your Amberlo account. Choose the user you would like to edit: just scroll through the list of your users and click on the user name you need to quickly update a user’s permission settings:
Adjusting User Permissions in Amberlo
- After selecting a user, the user card will open. On the first page, you will see the "User Info" tab. Navigate to the second tab, "Security" (1).
- In the table below (2), you will find all the modules of the Amberlo system, such as Contacts, Matters, Bills, Activities, and more. Select the module you want to modify and click (3) to open its settings.
In the example below, the Contacts module is selected:
- (4) To hide the entire Contacts module from the user, uncheck the corresponding checkbox.
- (5) To restrict the user from creating new contacts or companies, uncheck the checkbox.
- (6) This option applies to the Client Portal Feature and allows employees to share information via the Client Portal.
- (7) If these checkboxes are marked, the user will be able to view, edit, and delete all contacts in your company.
- (8) If (7) is unchecked and (8) is checked, the user will only be able to view, edit, and delete contacts and companies where they are assigned as a team member.
- (9) If both (7) and (8) are unchecked, the user will only be able to edit and delete the contacts and companies they have created.
- (10) You can grant admin access to the user. In this example, the user is not an admin.
- (11) If your organization has multiple branches, you can assign a specific branch to the user. This ensures that the correct invoice details are automatically applied.
After making all necessary adjustments, click the SAVE button to apply the changes.

We hope this will help you to start using it smoothly. If you have any questions or feedback, please feel free to contact us via support@amberlo.io. We are always happy to hear from you!